Learning Hospitality Week 2 – The Community Table (Sneaky, Snacky Sausage)
For those of you just joining…here’s the challenge
Each week I’ll be doing something “hospitable” and this month, the focus is on the dinner table. If you’d like to join me, just agree to try one new dish per week (any side, entree, dessert, whatever) and post it in the comments. (You can even win prizes.)
(Here’s last week’s results.)
Last week, Dawn Thomas, the Belton Mom won a copy of Shauna Niequist’s book Bread and Wine.
Participate?
If you’d like to participate, you can join in any time. Just add your recipe (and, if you want, tell us about your experience) in the “Leave a Reply” box below this post. Then, if you have a photo of your meal, post it to your social networks and make sure to include #learninghospitality among the words so others can find it.
Add your recipe this week and one reader will be chosen to win a free copy of Tammy Matlby’s Lifegiving book AND the accompanying journal.
Some highlights from last week
I loved the words of friend and Soul Carrot blogger Christy Foster who posted her recipe Tuesday. “Because of food intolerances, I have to be grain-free. Before I discovered that, I was already vegetarian. So, you would think a grain-free vegetarian never eats! Or, cooking must be a nightmare! Wrong! I LOVE food & I have to keep it simple! In fact, I really don’t ever use recipes, just whatever sounds good.”
Christy has put a lot of thought and effort into the subject of healthy eating and it shows.
But I loved just as much the words of, say, Christine who said, “I’m starting back into the whole hospitality thing slowly with coffee and Banana Buttermilk Muffins” or Carrie who admitted “I am not overly healthy in my fave dishes, so there’s your warning.”
New, rusty and veteran cooks are coming together online around the topic of bringing people together around food in real life. And I kind of love the feel so far.
So here’s a look at what’s happening in my kitchen
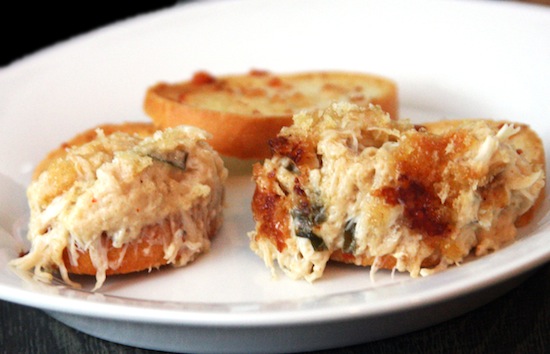
On Tuesday, I set out to make two separate recipes for two different meals. The first was crab toast.
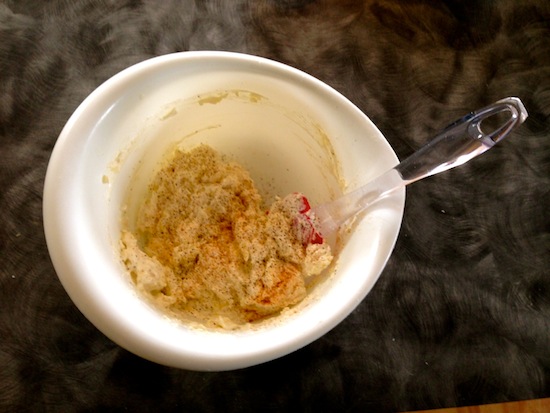
[disclaim](One pkg of softened cream cheese, a cup of shredded mozzarella, a dash of pepper and nutmeg, and a third cup sour cream plus a cup of fresh or pre-cooked crab meat. Mix together. Bake for 15 minutes at 350. Spread on baguette slices. Optional: top with parsley, finely chopped tomatoes or peppers.) [/disclaim]I got 80% done with the recipe before I realized my can opener was MIA. I sent multiple panicked “we lost the can opener” texts to my husband who suggested I search the basement (to no avail, sadly), before I concluded the can opener had likely been swiped by the just-turned-four-year-old emperor for use in one of his gallactic battles between Zurg and Buzz.
No doubt I’ll find it embedded in some poor unconscious stuffed animal later in the week.
My husband had to buy me a new can opener so I could finish the recipe later that night.
How’s that for real-life cooking?
The second recipe was a simple sausage-y pasta. I don’t eat much with sausage (besides the occasional breakfast side or a slice of someone-else-ordered-it pizza) but this was my chance to give these scary (but sometimes delish) little casings their due. Making it was an easy with-toddler experience, although we did have to take a half-time prep break to play his new favorite game, The Sneaky, Snacky Squirrel Game, in which you try to spin to collect and steal multi-colored acorns. When we returned to the kitchen, Justus’ extended version of the game involved trying to sneak away clumps of sausage.
I hereby dub this Sneaky Snacky Sausage.
(Due to can opener delays and sneaky squirrels, I’m sliding by with a few phone pics to compliment a couple from my DSLR. I may invest in a light box and stop muddying through these soon. We shall see.)
[line]Sneaky Snacky Sausage
[disclaim][/disclaim]Ingredients:
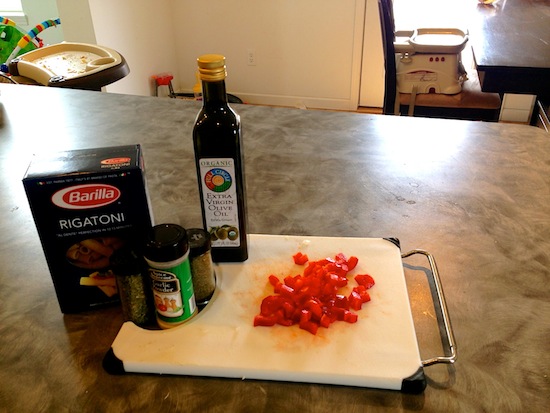
1 lb. of Italian sausage (links or ground)
1 box of Rigatoni
3 tbsp Olive Oil
1 chopped garlic clove
1 chopped sweet red pepper
How to Make It:
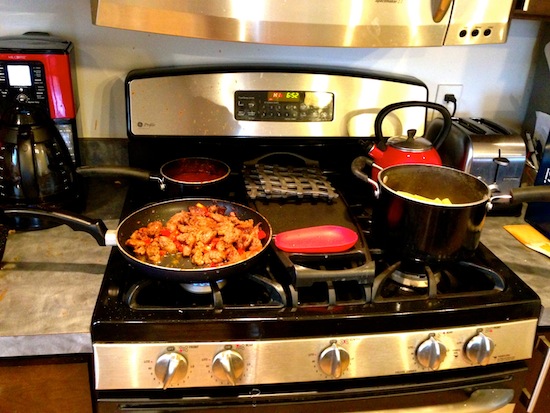
1. Cook Italian Sausage in pan. Slice into small bite-sized pieces.
2. Cook and drain rigatoni.
3. Saute a couple tablespoons of olive oil and chopped garlic. (I substitute garlic powder when there’s nothing fresher on hand. It’s not as good but does the trick.)
4. Chop a sweet red pepper. Add it to the oil and garlic for 2 minutes.
5. Toss the red pepper and sausage bits into the noodles. (I make half without peppers too for picky eaters.)
6. Serve with your favorite sauce as desired. And/or sprinkle with a light layer of parsley bits and go healthier or upgrade to some shredded mozzarella topping for a nice tasty finish.
[disclaim][/disclaim]



Hilary April 25, 2013 (7:25 pm)
The only way I can survive working full time and feeding my family is to do meal planning. I’ve been doing this since my girls were little. Although now that they’re tween/teens, it’s getting harder and harder to eat together as a family due to competing schedules. But I do try to cook for us at least once or twice a week.
I usually look ahead to the week’s schedule and on Saturday or Sunday do a meal plan and shopping for the week. Then over the course of the week, I have a variety of recipes ready to make. I usually try to mix it up between old favorites and new recipes. I also try to figure in how long something takes to cook in case someone is home late or has to rush off to an evening softball practice.
So tonight I’m exhausted. I had a public meeting at work that lasted until 10:30 last night and another three hour meeting today. This is the first night everyone will be home all week! So it’s comfort food night – soup and sandwiches! Below are the two recipes I’m cooking this evening. You get a two-fer since I didn’t contribute last week. :-)
Full disclosure – I have made the soup once before, but the sandwich recipe is new.
Ruben Panini
2 Tablespoons butter, softened
8 slices rye bread
1/4 Cup thousand island dressing
1 Cup sauerkraut, drained & squeezed dry
3/4 Pound corned beef, thinly sliced
8 slices wiss cheese
Instructions: Heat panini grill.
Spread butter on one side of each bread slice. On unbuttered side spread 1 tablespoon thousand island dressing. Top with 1/4 cup of the sauerkraut, 2 oz. corned beef, 2 slices cheese, and remaining bread slice, buttered side up. Repeat for remaining sandwiches.
When grill is heated, place sandwiches on grill. Close and grill 5-6 minutes or until cheese is melted and grill marks appear. Serve immediately.
Panera Broccoli Cheese Soup
1 tablespoon melted butter
1/2 medium chopped onion
1/4 cup melted butter
1/4 cup flour
2 cups half-and-half cream
2 cups chicken stock
1/2 lb fresh broccoli, chopped
1 cup carrot, julienned
1/4 teaspoon nutmeg
8 ounces grated sharp cheddar cheese
salt and pepper
Instructions: Sauté onion in butter. Set aside.
Cook melted butter and flour using a whisk over medium heat for 3-5 minutes. Stir constantly and add the half & half.
Add the chicken stock. Simmer for 20 minutes.
Add the broccoli, carrots and onions. Cook over low heat 20-25 minutes.
Add salt and pepper. Can be puréed in a blender but I don’t. Return to heat and add cheese. Stir in nutmeg.
Sarah April 26, 2013 (9:25 am)
@Hilary Can you come organize my meny? =) And these both look delicious. Panera soup recipes? Hard to go wrong! Thanks for participating!
Jessica April 25, 2013 (8:05 pm)
Monday was my boyfriend, Dan’s, Birthday! I decided to surprise him with a recipe themed around his favorite chocolate treat Ghirardelli Salted Caramel Chocolates!
Salted Caramel Cappuccino Cheesecake! I tried the recipe before but the coffee flavor was WAY to strong so this time I omitted the instant espresso powder and it was just right!
Salted Caramel Cheesecake:
Ingredients:
1 package (9 ounces) chocolate wafers
1 cup (6 ounces) semisweet chocolate chips
1/2 cup packed brown sugar
1/2 cup butter, melted
FILLING:
3 packages (8 ounces each) Cream Cheese, softened
1 cup packed brown sugar
1/2 cup sour cream
1/4 cup Kahlua
2 tablespoons all-purpose flour
4 eggs, lightly beaten
TOPPING:
1/2 cup hot caramel ice cream topping
1/2 teaspoon coarse sea salt
Directions:
Place a greased 9-in. springform pan on a double thickness of heavy-duty foil (about 18 in. square). Securely wrap foil around pan.
Place the first five ingredients in a food processor; cover and pulse until fine crumbs form. Gradually add butter, pulsing until combined. Press onto the bottom and 2-in. up the sides of prepared pan; set aside.
In a large bowl, beat cream cheese and brown sugar until smooth. Beat in the sour cream, Kahlua, flour and espresso powder. Add eggs; beat on low speed just until combined. Pour into crust. Place springform pan in a large baking pan; add 1 in. of boiling water to larger pan.
Bake at 350° for 55-65 minutes or until center is just set and top appears dull. Remove springform pan from water bath; remove foil. Cool cheesecake on a wire rack for 10 minutes; loosen edges from pan with a knife. Cool 1 hour longer. Refrigerate overnight.
Pour caramel topping over cheesecake. Refrigerate for at least 15 minutes. Remove rim from pan. Just before serving, sprinkle sea salt over caramel.
Jessica April 25, 2013 (8:06 pm)
how do I add a picture? I remembered to take one this time!
Sarah April 26, 2013 (9:27 am)
Jessica, this sounds amazing. And intimidating. Where do I find sea salt? Working on the photo upload feature. Upload it to Facebook and tag #learninghospitality for now. :)
Jessica May 2, 2013 (3:20 pm)
Sea Salt is found in the Spices isle next to the regular sale.
Jessica May 2, 2013 (3:21 pm)
*regular salt
Christine April 25, 2013 (9:53 pm)
I had bought the ingredients to make this pork tenderloin dinner on the weekend, hoping to find a night to make it for my family between lacrosse games, meetings and other activities. Fortunately, the pork tenderloins come in those vacuum-sealed packs so I knew they could stay in the refrigerator for a while.
Serendipitously, my son’s lacrosse game was cancelled by mid-afternoon on Monday so I knew I had a good window of time to make it that night. It was nice to be ‘hospitable’ to my husband and sons (and myself!) by having a relaxed meal at home together with out having to eat fast because of homework, sports, work, meetings or other activities.
I forgot to take photos…again. Sorry.
Island Pork with Sticky Coconut Rice
For the pork:
– 2 pork tenderloins, 2 1/4 – 2 1/2 pounds total
– 2 tablespoons olive oil
Rub:
– 2 teaspoons salt
– 1/2 teaspoon black pepper
– 1 teaspoon ground cumin
– 1 teaspoon chili powder
– 1 teaspoon cinnamon
Glaze:
– 1 cup brown sugar
– 2 tablespoons finely chopped garlic
– 1 tablespoon Tabasco
Preheat oven to 350°F.
Mix “Rub” ingredients, then coat pork with spice rub.
Heat olive oil in an ovenproof 12-inch heavy skillet over moderately high heat until just beginning to smoke, then brown pork, turning, about 4 minutes total. Leave pork in skillet.
Mix glaze ingredients. Pat onto each tenderloin and roast in the center of oven until instant read thermometer inserted diagonally into center of each tenderloin reads 140°F, about 20 minutes. Remove from oven and let pork rest 10 minutes in skillet. Slice into 1/2? – 1? slices and serve over sticky coconut rice, pouring some of the remaining glaze over the pork and rice.
Sticky Coconut Rice
– 1 1/2 cup jasmine rice
– 1 15-oz can regular or light coconut milk
– 1/3 – 1/2 c. sugar
– 1 cup milk
Put rice in a medium sauce pan and combine with coconut milk, milk and sugar. Bring to a boil, stirring regularly, then reduce heat to low and cover pot. Simmer for about 25 minutes (could take up to 45 minutes depending on the rice). Stir regularly.
Serves ~6 adults.
My family loved the pork but would rather have had plain rice instead of coconut-flavored rice. I, on the other hand, loved the rice. It accompanied the flavors of the pork perfectly.
Sarah April 26, 2013 (9:30 am)
I love that people are expanding to two recipes. Sticky coconut rice… how strong is the coconut taste? Will anti-coconut people go for it? Sounds good to me!
So Every Day April 26, 2013 (7:52 am)
I’m not anti-sugar.
But I sure am trying to bake more with less sugar.
I pinned these German Chocolate Fudge Bites a rawther long time ago.
Intrigued by the picture, I clicked the rectangular “pin it” and moved on with my day.
Eventually, I read the ingredient list, saw that the primary ingredient was dates and never gave these bites another thought.
I’d never tried a date but they looked like overweight old raisins and seemed like the primary ingredient in fruit cake and neither of those facts drew me to the date as a viable food option.
A few weeks ago we were going to a friend’s house and when we arrived she was crafting these date-laden German Chocolate Fudge Bites. I like her, I was raised to be polite and so when she offered one to me – I accepted.
It was delicious.
And completely sugar free.
Chocked full of good simple ingredients.
But when I left her house I pretty much forgot about these guys.
Until the week before last when I was standing in Publix and saw a container of dates.
(Which do still look unappetizing.)
I bought the dates.
Came home and literally whipped up these fudge bites in a few minutes.
The kids all thought they were a delicious snack. Otto begged for more and woke up asking about them.
I felt great allowing the kids to snack on them and they absolutely satisfied that craving for just a touch of something sweet after dinner.
Big win.
The only down side is that you definitely need a food processor when concocting these and our food processor literally heaved its last breath while I was making these.
It was not the fault of the fudge bites. The poor processor was more than seventeen years old – I think it was a wedding gift. It had been limping along for ages with a giant crack along the bottom and a gaping hole near the top. You had to cover one section with your hand to keep the inside ingredients from flying around the kitchen.
But since then I haven’t been able to create any more Fudge Bites and that’s a shame. (Recommendations on the best food processor?)
Also, coincidentally, it was the same night our dryer decided to heave its last breath as well. But since you don’t make Fudge Bites in a dryer, the loss is not as devastating.
Anyway, these German Chocolate Fudge Bites are perfect.
Make them today.
(Or six weeks from now when you see dates in the aisle at your favorite grocery store.)
German Chocolate Fudge Bites
3/4 cup pitted dates
1/2 tsp pure vanilla extract
1/16 tsp salt
2 tbsp cocoa powder (or raw cacao powder)
2 tbsp shredded coconut
1/3 to 1/2 cup raw pecans (or almonds or actually whatever nut you have available)
optional: feel free to add some chocolate chips
Blend all ingredients together very well. Squish the dough together. Roll into balls, cookie-cutter shapes, or bars… or you can even use it for a pie crust!
______
I did not add the chocolate chips – but I might next time. I used almonds and loved them. Almonds are cheap at Trader Joe’s and they’re my personal favorite.
My only complaint – there are not enough!
And I like the original author’s idea of using this a pie crust – what pie would pair will with this?
Happy Baking!
Sarah April 26, 2013 (9:31 am)
Crazy. You’re right. I think of Dates as like… something a nutritionist might prescribe to an elderly person. I need to redeem Dates’ place in my desserts, I guess. :)
Joanna April 27, 2013 (6:38 am)
This week I cooked Mexican Pile Up from the cookbook One Family One SUpermarket by Bronwyn Cameron (great book. Think it was only released in Australia and might be out of print, but absolutely worth buying if you can find it)
3/4 cup of long grain white rice
1 tablespoon olive oil
500 grams lean beef mince
1 onion, finely chopped
250 grams tomato paste
400 gram can diced pealed tomatoes in juice
1 tablespoon white sugar
One cup water
45 grams chilli con carne recipie base
One large packet of cornchips (eg. doritoes)
Half an iceberg lettuce, shredded
2 tomatoes, diced
1 cup shredded tasty cheese
-Cook rice and set aside
-Heat oil, then cook mince and onion until mince is well brown
-Add the tomato paste, canned tomatoes, sugar, water and cooked rice to pan and stir
-Gradually add chilli con carne mix until it is spicy enough
– bring to boil, reduce heat and simmer covered for twenty minutes. Stir regularly
– Serve a scoop of the mixture on top of a layer of cornchips.
– Top with lettice, diced tomatos and cheese
And here is the result. http://twitpic.com/cm9wdl
If I do it again I’ll add more spice than the recipe recommended, but other than that it was pretty good. I’m guessing mixed spices would work in the place of the chilli con carne mix
Sarah May 2, 2013 (9:43 am)
@joanna, that sounds like such a niche cookbook but now I want it. :)